Viewer
The viewer displays your model, allows you to explore it and learn information about it.
It can be opened by clicking on "Model" at the top center of the window.
You can use various functions and different settings to change the view of your model and adapt it to your needs.
To open the viewer, a sheet set of your model must be opened in the "Models & Plans" tab. The viewer offers the possibility to display the selected version of the project and to analyze it with the help of several tools.
Measuring Tools
Use these functions to view the dimensions of your model.
 |
|---|
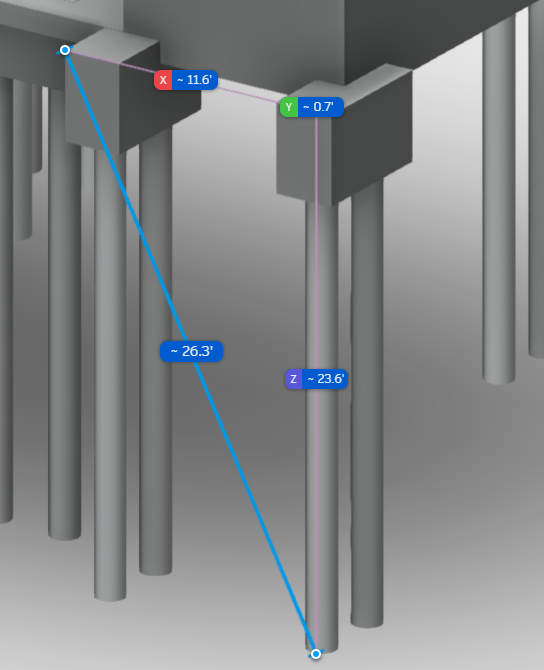
Distances
 |
|---|
With this option the distance between the selected points as well as the distance along all axes relative to the origin can be read out. To measure the distance, the two points to be measured need only be connected with two mouse clicks:
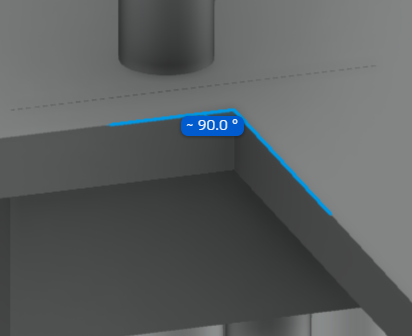
Angles
 |
|---|
This tool allows you to measure angles. To measure an angle, select three points that form a corner.
Measurement Settings
 |
|---|
After selecting this button, the following windows revealing four options are displayed:
 |
|---|
The unti type allows you to switch between 10 different units of measurement. The precision function allows you to choose the number of digits after the decimal point. If you activate this option, the image of the building is isolated, or extracted. Free measurement options can be activated, too.
Deleting Measurements
 |
|---|
This function deletes all currently visible measurements.
Changing the View
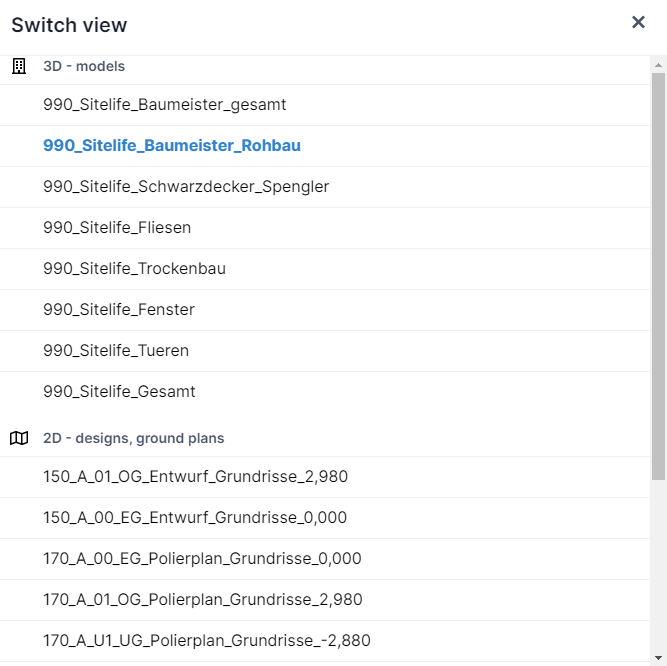
When you upload a project using our Revit addin, you also export the views it contains.
Use the drop-down menu to access all exported views. In the menu that opens, you can switch to the desired view by simply clicking on it.
 |
|---|
Element Properties
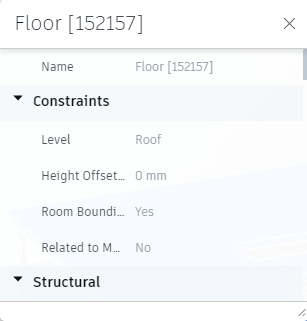
Many elements in a project have pre-defined parameters. These can be filtered in the Construction Report, but not in the view (not by default). The project manager is responsible for setting these parameters.
Properties
 |
|---|
This tool displays the Revit properties of the selected element. The properties displayed here can be changed in the property settings in the Construction Report. It also works the other way round, though. If you select, for instance, a window in the model, all information about this window is displayed in the Model Properties window.
 |
|---|
Selection Window
 |
|---|
After clicking on this button, you can use the left mouse button to drag a window that selects all the elements inside. Only the elements that are fully inside the window will be selected.
Additional Features
Show/Hide Additional Options
 |
|---|
This button hides additional options.
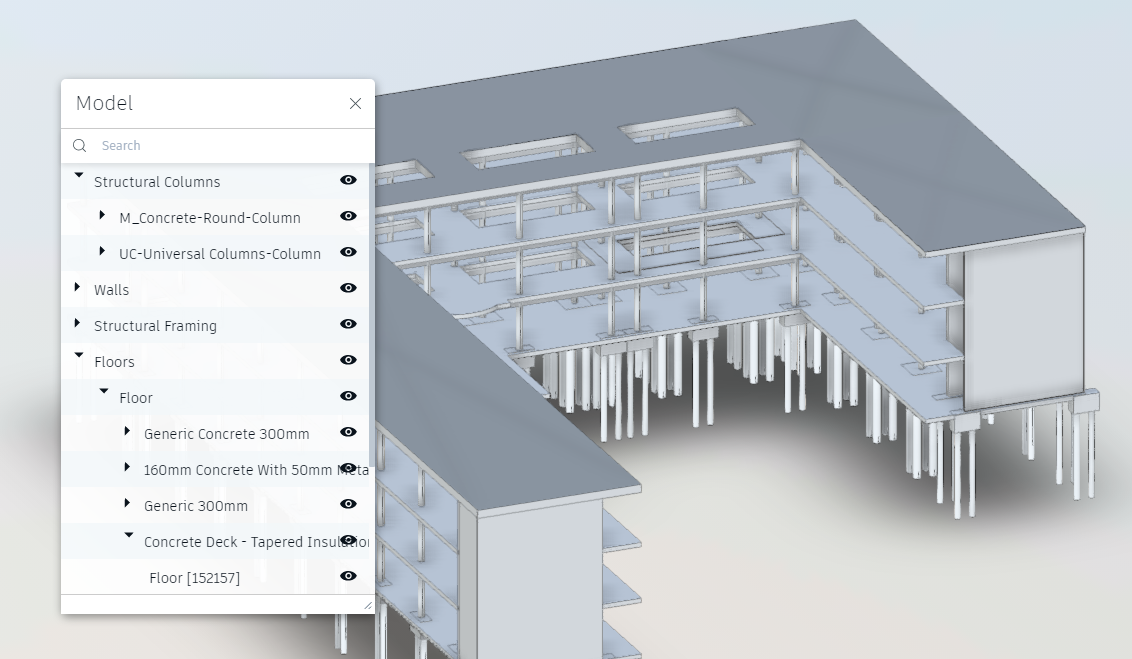
Model Browser
 |
|---|
The user can show or hide parts of the model as desired or required. A list of the components is available. To show / hide them, you have to click on the "eye" symbol:
 |
|---|
Viewer Settings
 |
|---|
Advanced settings can be selected in the settings window.
Full Screen
 |
|---|
This allows you to switch your viewer to full screen mode. To exit this mode, click on the full screen symbol again.
Labelling
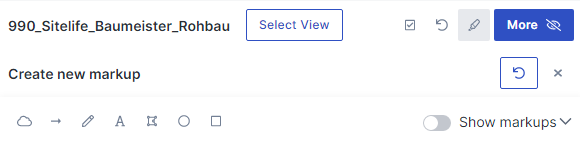
After you have activated the labelling mode by clicking on the pencil symbol, you can insert labels and characters in your viewer. These labels are visible in a screenshot for the PDF report.
After clicking on the pencil symbol, a bar with several functions opens:
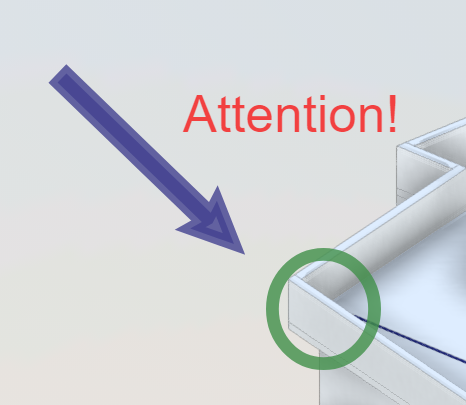
- Cloud: Creates a square cloud (text field) for changes to be inserted
- Arrow: Draws an arrow
- Pen: With the help of the pen you can draw your own shapes and lines using your free hand
- Text: Inserts text at the selected position
- Connected lines: Draws a straight line between the start point and the cursor. By clicking you fix it and start the next line connected to the end point of the previous one. You exit this mode by double clicking.
- Circle: This tool enables you to draw an ellipse or a circle.
- Square: Aids you in drawing squares.
After selecting a function you will be able to select two more options:
- Colour: Allows you to choose and change the colours for the different action types
- Pen width: Choose from three default line widths. You are also able to define your own width.
 |
|---|
Anything you have drawn or written can be moved around by you after clicking on it; delete selected items with "Del". Click on the "X" to exit the labelling mode, remove all labels, and hide the bar with the labelling functions.
 |
|---|
To add your captions, your commented and labelled view, to your Construction Report, take a screenshot and add it to your daily report. With the help of this markup-screenshot you are able to come back and edit your labels later on.