Day Information
In here, you learn how to enter the workdays' daily information, the NMBs and how to add screenshots and other images. For each day, the responsible trade (tech crew) must enter the required information individually.
The left panel of the application is used to enter all day-related information in a predefined format. This information must be entered separately for each trade and can later be printed collectively on the daily report for any desired date.
Components
Weather
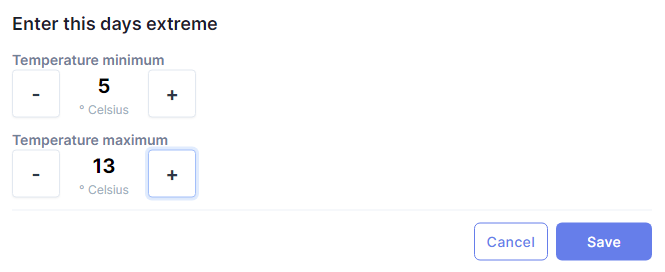
Your minimum and maximum daytime temperatures can be entered separately.
To enter the minimum or maximum value, click on "+ Add Daily Min/Max Temperature" to open the corresponding window.
 |
|---|
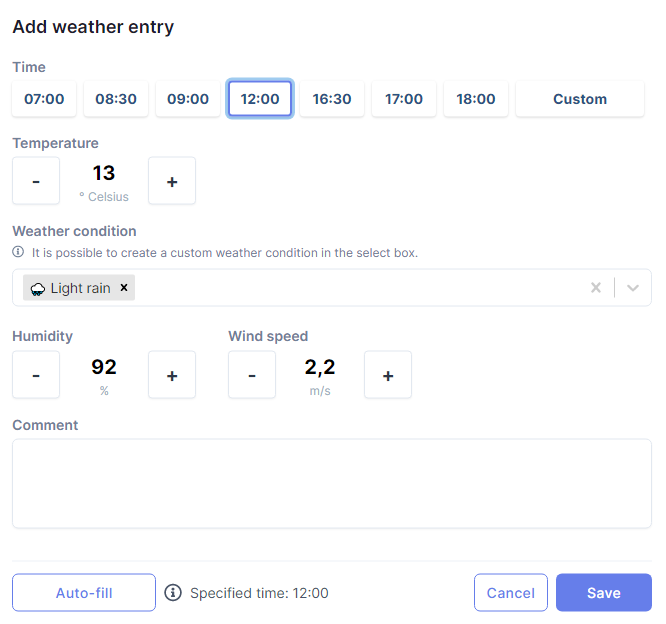
You can then add a weather entry for a specific time as often as you like by clicking on the "+ Add Weather Entry" symbol. This opens a window in which your information must be entered. The field on the right allows you to add a user-specific entry.
 |
|---|
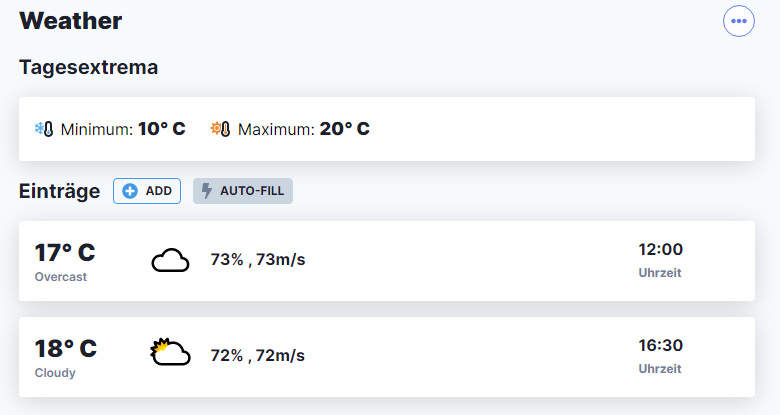
The entered data now appears below the respective headline.
 |
|---|
Weather Provider
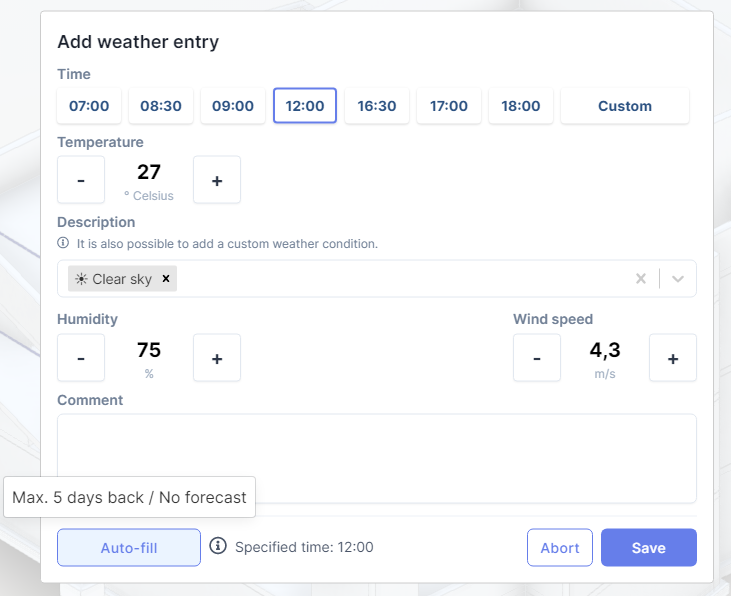
If you activated OpenWeather in your project settings, you are able to fill in the weather information automatically. You must select a time and click on "Auto-fill".
 |
|---|
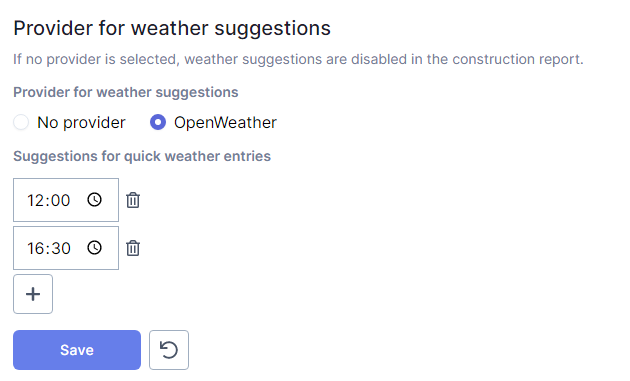
You are also able to pre-define certain times in your project settings. By clicking on the lightning in your day information, these times will be filled in automatically.
 |
|---|
To use this feature you first have to add your coordinates to your project information. Without them you are not able to use this feature.
You are not able to fill in predictions for future days. Also workdays older than 5 days are not able to use this feature.
Attendance
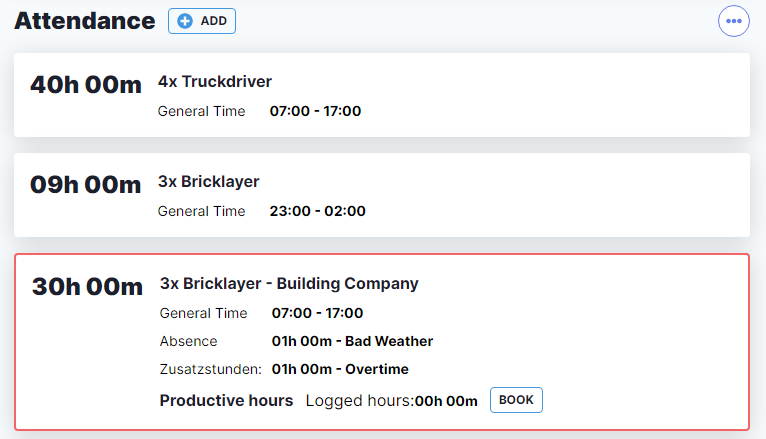
You can add an arbitrary amount of attendance entries per workday in your construction report.
 |
|---|
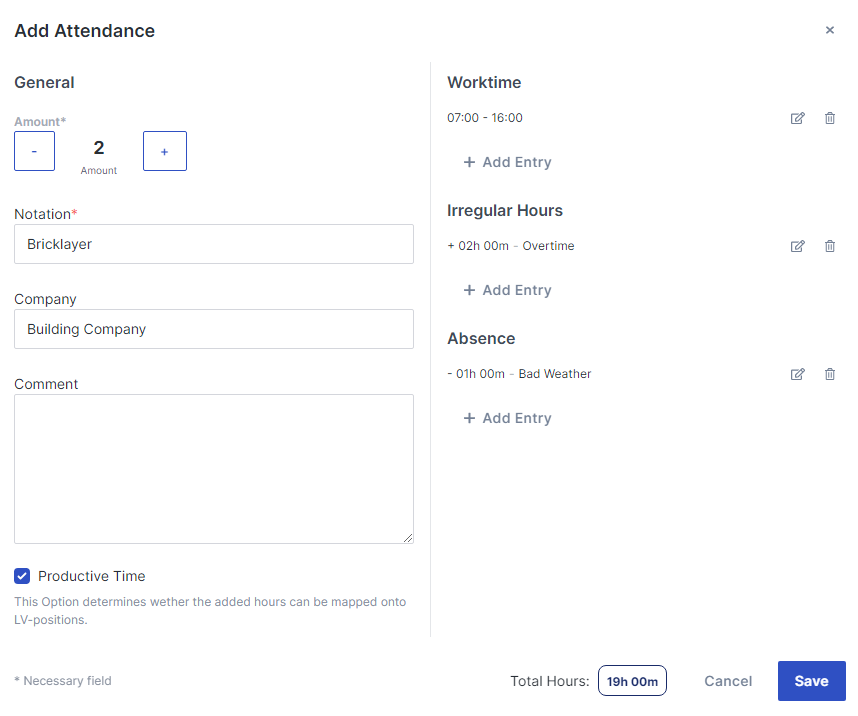
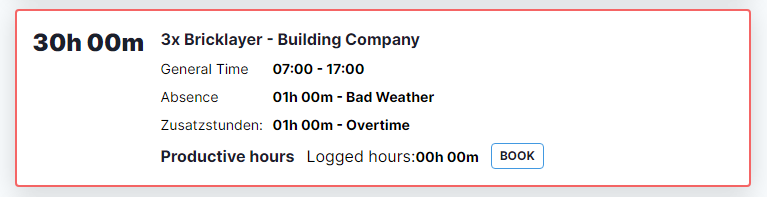
In addition to number, notation, company, a comment and the hours worked you are able to add in irregular hours and absence. The total time is calculated and is available for use as productive hours in combination with your BOQs. Besides that, we also suggest the most used time intervals, names and companies.
To open the interface click on the "+ Add Attendance" button. To add a timeframe click on th "+ Add Entry" button or select a suggested timeframe. By checking "Productive Time" you determine if you are able to assign the time to a position from your BOQ.
 |
|---|
By clicking "Save" you save your entry and close the interface. You are able to reopen and edit you entry later on.
You can also enter night shifts spanning into the next day.
Equipment
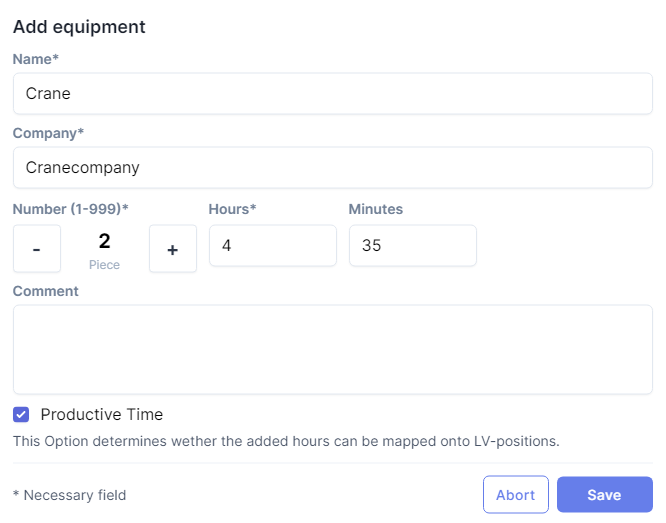
To add information regarding the equipment deployed on site, click the "+ Add Equipment" button and fill in the window that opens.
 |
|---|
The saved data is now displayed on the left.
 |
|---|
Both attendance and equipment entries can be reorganized via drag&drop.
Comments
Each trade can fill in one comment field per workday. To do so, click on button "+ Add comment". A text field opens in which a paragraph of any desired length can be entered.
Additional fields
Similar to the comment field, it is possible to define and fill in other fields. However, this feature is reserved for the project manager. If you wish to be given an additional field for your trade , please contact him or her directly.
Productive Hours
If you added a Bill of Quantities to your Construction Report, you are able to specify productive hours for equipment usage and attendance. To be able to do this you have to tick the "Match productive hours to specification positions" in your Construction Report settings. Your trade also needs to have a BOQ assigned to it.
In order to mark an entry as productive work time, you need to tick "Productive time" during the creation process.
 |
|---|
 |
|---|
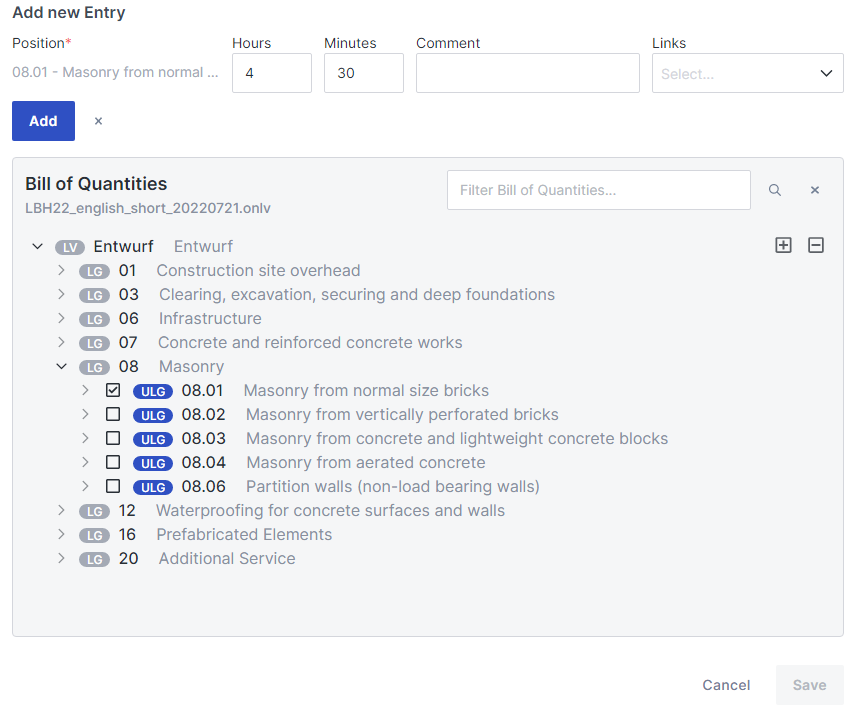
To add an entry for attendance click on the "Book" button beside the new attendance entry. Select you assigned positions and add in the time frame. Click "Save" to save and exit.
Your construction report settings house an option that enables warnings if a productive entry misses a label. However, this will not keep you from saving the entries you have made.
Your entries will be listed below the attendance entry they belong to.
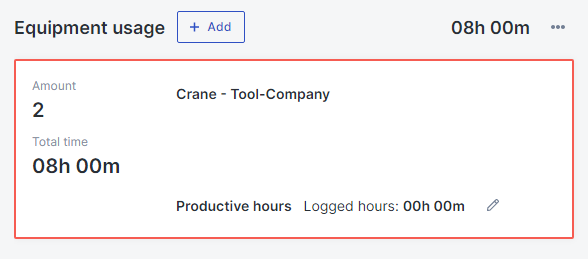
Productive hours for equipment are entered the same way.
 |
|---|
A day with less productive hours than general workhours is not lockable.
Copy information from other days
You are able to copy the information from past days to your present day.
 |
|---|
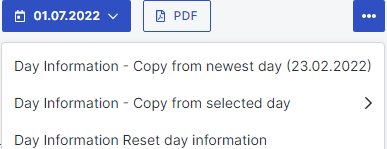
Open your day-related information tab and click on the button right beside "Day Information". Select if you want to copy the last day or a specific one. You have to confirm your decision after selecting.
You are also able to do this for all parts of the day information individually.
Copying information will irreversibly overwrite your current information.
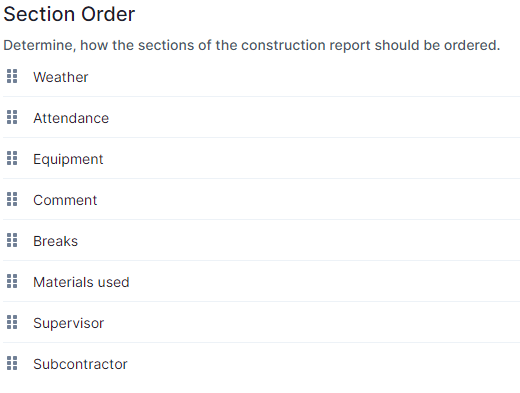
Section order
You are able to adjust the order of the sections mentioned above. In order to do this you need to navigate to the Construction Report settings. Scroll to the header "Section order" and adjust your sections via drag&drop.
 |
|---|
Tabs
 |
|---|
At the bottom left, there are five tabs that provide additional options for entering various information about the workday. By default, the general "workday info" that has just been dealt with is selected at the beginning. Click on one of the tabs shown to enter the upcoming data for the daily report.
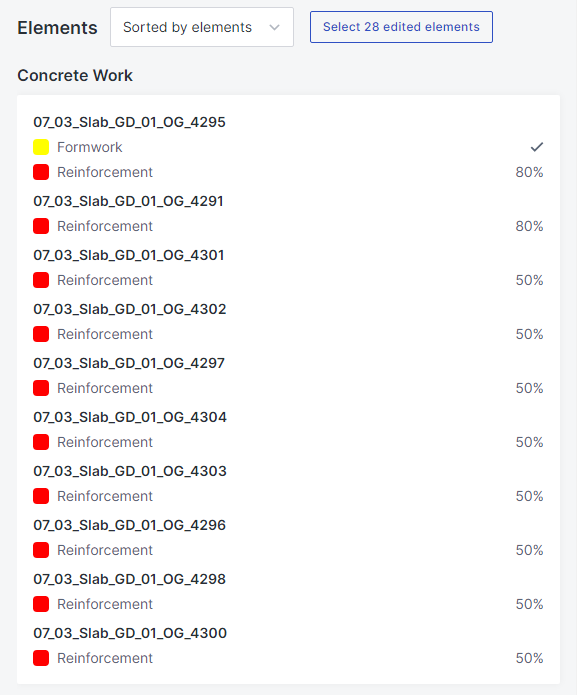
Elements
In the elements tab you can see a list of the construction progress notes for any selected workday. This information is updated automatically with each action you define or set for the elements in the viewer.
 |
|---|
Clicking on the name of an element selects the corresponding object in the Viewer. You can sort the displayed information by elements or by action (by default, the list is sorted by elements/components; press the 🔨-symbol for listing it by actions) with the button in the upper right corner.
Force Account Work
In order to add force account work to your trade , open the Construction Report for the corresponding trade and switch to the tab "FAW" in the left section of the page. Here you will be shown all the recorded work and you can delete or edit it.
 |
|---|
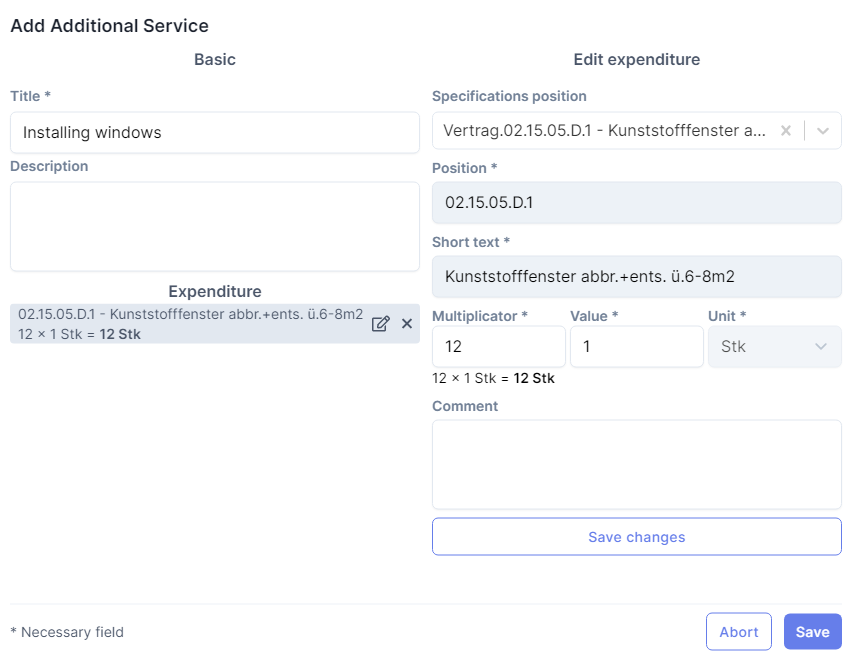
Click on "Add Attendance" or if an entry already exists on "Add" to open a window in which you can create a new service. Enter a title and a description.
 |
|---|
Next, select the required position from the "BOQ item" drop-down menu. Your choices are determined by the imported .onlv file. The lines below are filled with the corresponding information. You only have to enter the numerical values. With the "Add" button, you add what you have just entered to the force account work report. Several entries can be grouped together under one work item. These are listed under "Expenditure" and can be deleted in there as well. You can finish your entry by clicking the "Save" button.
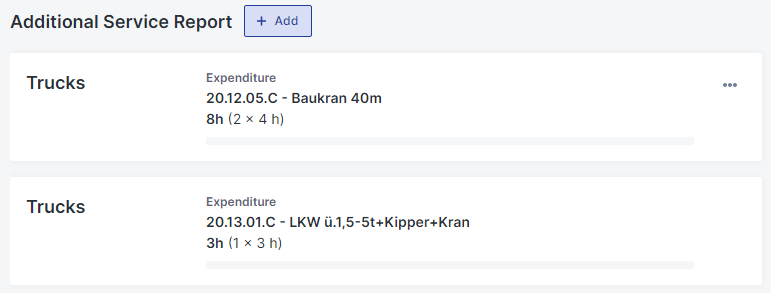
Force Account Work Report
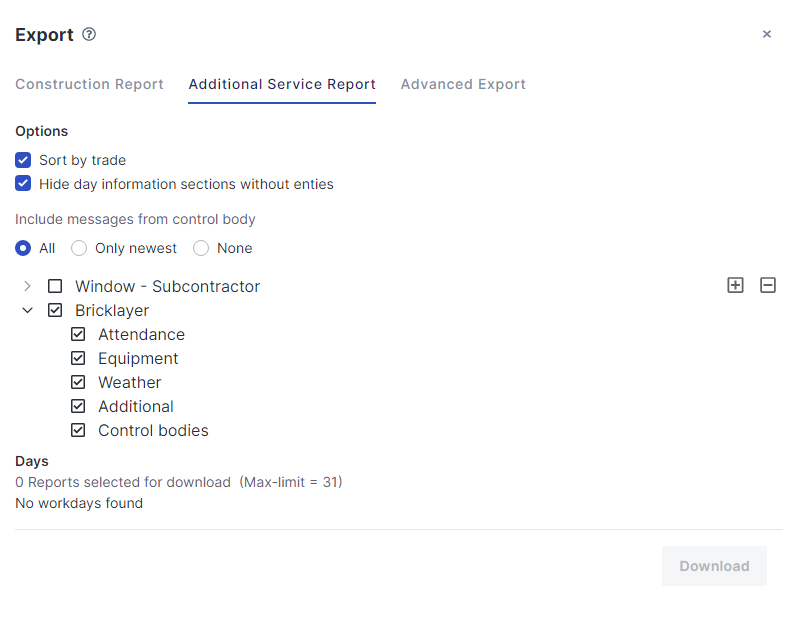
To download an force account work report which only includes the relevant extra services, open the "Export data" interface and switch to the tab "Force Account Work". Here you can set the trades you wish to be included in the report as well as the required time period the downloaded report should cover.
 |
|---|
In the daily Construction Report, your force account work report is displayed separately under "Force Account Work".
Images
In the image tab, you can add screenshots or photos you have taken yourself to your daily report. Click on the "+" symbol to open the capture window.
 |
|---|
To do this, either select "📄 File" to open a file dialogue or, in the case of a mobile device, directly take and upload a photo. It is also possible to take a screenshot picture of the current viewer by clicking on "📷 Screenshot" (including all applied filters).
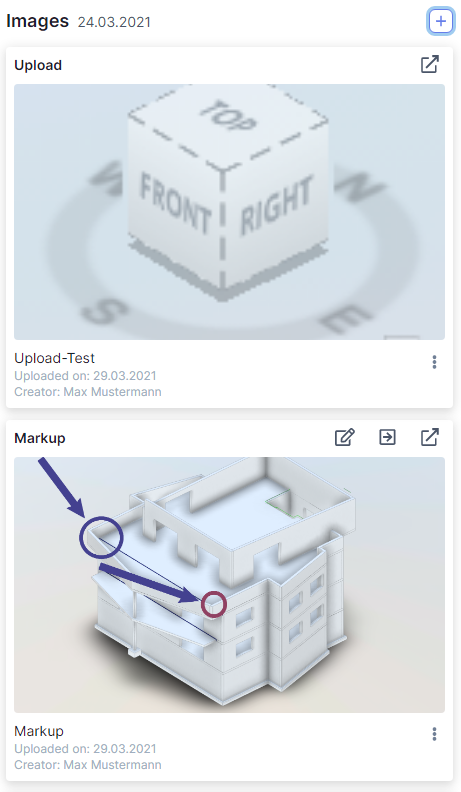
All images files must be provided with a description. They will then be displayed as thumbnails. You can then both rename and delete the image files you have added.
Depending on how you added your picture it belongs to a different category.
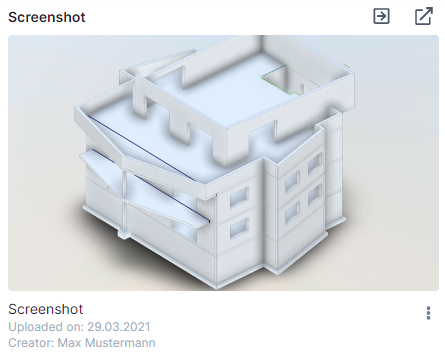
Screenshots can be used to restore the camera position they were captured in..
Uploads have no additional features.
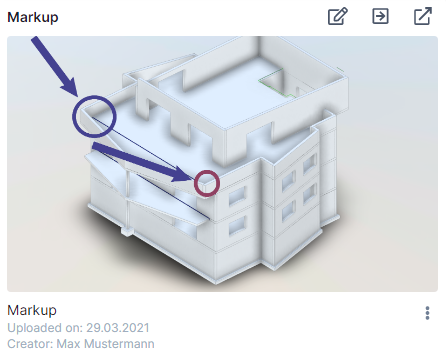
Markups
Markups can be crated by making a screenshot while creating a label. You can restore the used view and you are also able to continue editing you labels. You are also able to reset your labels to they state they were in when screenshoted. By saving them you will update your markup-screenshot.
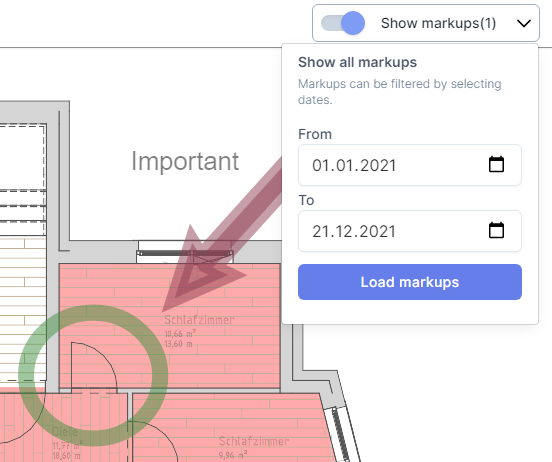
If you are in a PDF-Project or your view is 2D you are able to show markups from older workdays. In order to do this this, flip the "Show markups" switch at the upper right of the viewer. If you use the drop-down you are able to adjust the time frame the shown markups are located in.
NME - Construction Work without Model
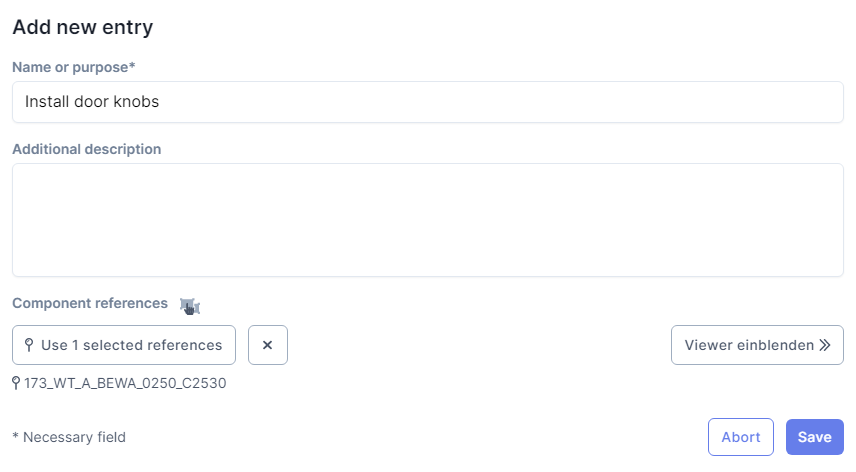
In the last tab you can record all construction progress for which no corresponding component exists in the model. You can create a "➕ Add New Entry" as often as you like via the button.
 |
|---|
You can now either enter a title with a text without any reference to the component and click "Save", or - if you want to define the element in the model - you can attach this information to an "unknown" component yet to be defined. You do this by selecting an element in the Viewer and attaching it by clicking on the 📍 symbol.
 |
|---|
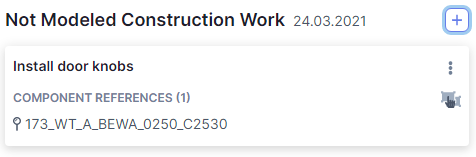 |
All created NMEs are listed under NME and can be deleted there at any time.
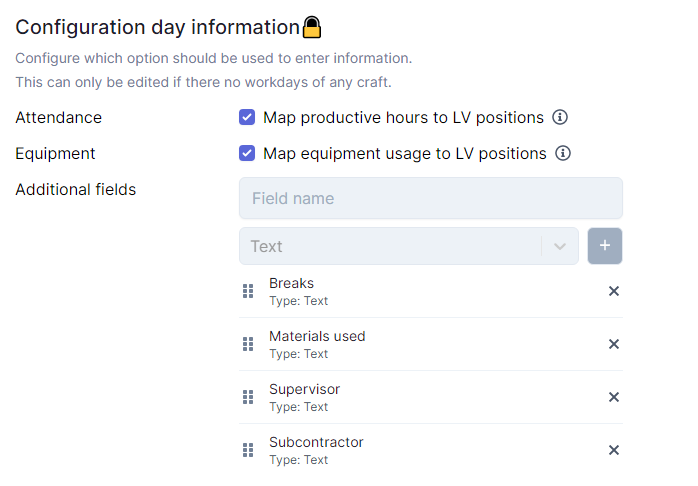
Settings
In the Construction Report settings, you can select which of these options you want to use for your day information. You can also create an additional field.
 |
|---|
You can only change the layout of the workday's info as long as you have not created any workday entries or reports yet.