Trades
In here you will find general information about the trades - the technical crews and contractors involved in the project - and learn how to create trade profiles and assign actions to them.
What Are Trades?
Trades are used within Sitelife to specifically limit workspaces and permissions. This allows different actions to be performed on the same item depending on the user's activity and role.
Each user must be assigned at least one trade in order to make changes to the daily report. A separate report is created for each trade , but you can also group all trades together. All trades must be created by the project manager and be given the corresponding action rights. Only the project admin can make changes to the trades and edit available functions and permissions.
Settings
Creating Trades
Users must have been allocated to a trade in order to make any changes to the Construction Report!
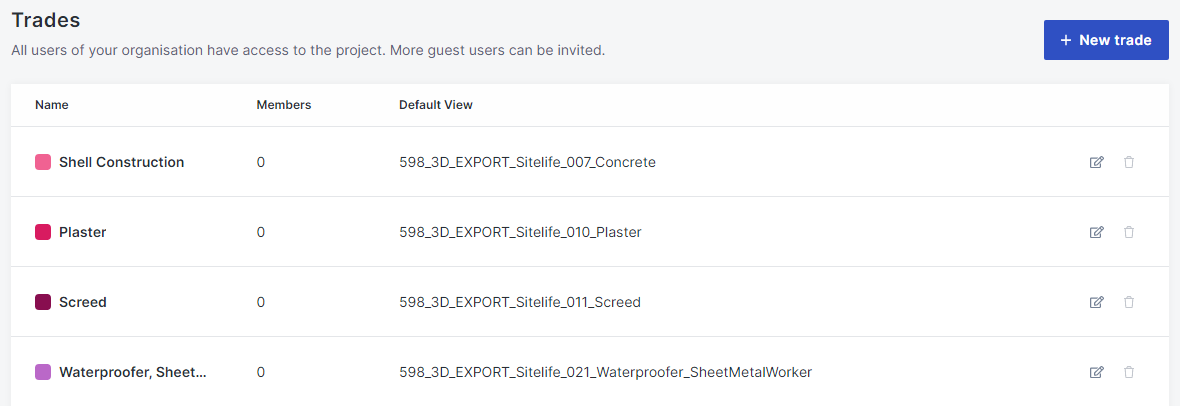
Navigate into the project and select the Trades-Tab.
 |
|---|
Click on "+ New trade" to create a new trade.
 |
|---|
Fill in the designation, add the respective users and select one of the exported views as the default start view.
Admins, Observers and members of controlling bodies can not be assigned to a trade.
Once a trade has been created, you can assign different action groups to it or define which actions may be performed on which components. In order to decide which parts of a model are visible for a trade, you have to assign a sheet set. After its creation, a trade can be equipped with multiple action groups.
The category parameter allows you to go beyond standard categories such as "Revit wall" and define in much more detail which components the trade can work, or is currently working, on.
For example, if all the walls have the parameter "Wall type" with the values "C25/30_concrete wall", "Plasterboard",... then, in a next step, actions can be defined that only access specific walls belonging to these categories instead of all walls in general.
Actions
Actions are the steps that a particular trade can take with regard to the elements of the project. These steps are documented with the help of the Construction Report and their progress is indicated as a percentage.
Several trades, i.e. technical crews, can be allowed to perform the same actions, or different actions on the same elements.
Creating Actions
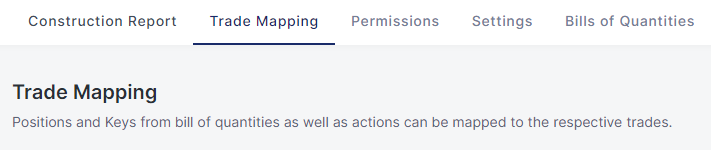
Navigate to the "Trade Mapping" section of the documentation.
 |
|---|
On the right hand side of the screen you will see all the actions that have already been created.
By activating the button "+ New action", a window opens in which you can define the name and color of a new action.
 |
|---|
Note that later in the daily report and various viewer views, components may be displayed in this color. Therefore, if in doubt, generally opt for signal colors instead of white/grey.
You can delete actions by clicking on the 🗑-symbol as long as they have not been used in a workday report.
You can change the name and color of an action as long as it has not yet been used in a workday report.
Action Groups
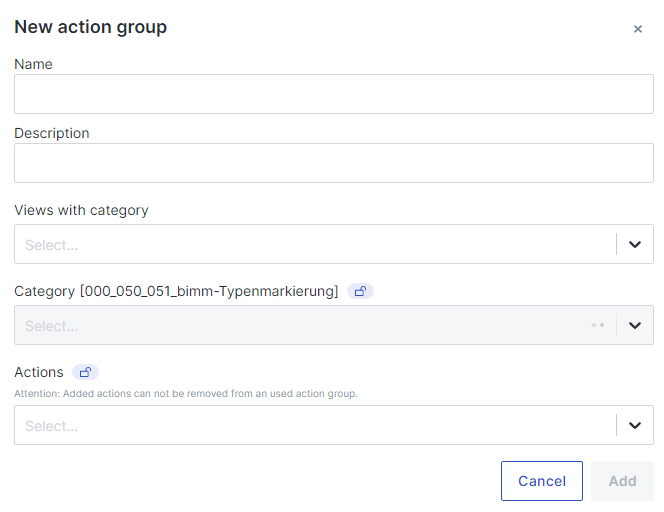
To assign an action to a trade , actions must be divided into action groups. Furthermore, action groups also define for which component categories the actions are possible.
Click on "Map action groups" to get to an overview:
Create a new action group with the help of the button at the top right and fill in the name and description. Afterwards, you can choose from the created actions for the selected categories which of them each trade can perform.
 |
|---|
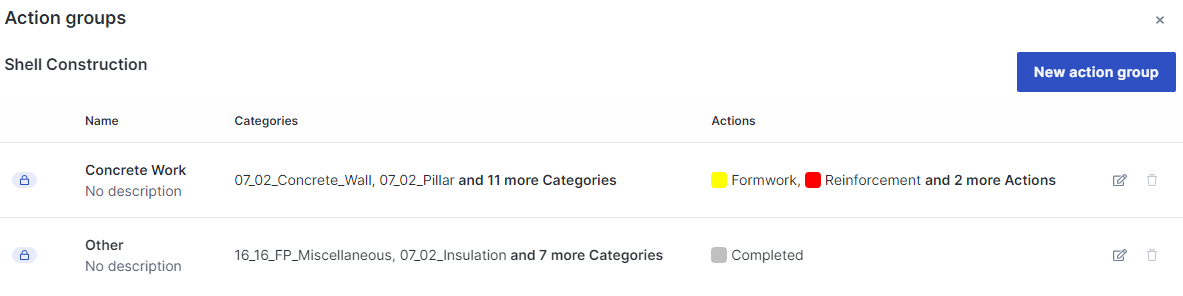
You can create as many action groups as you like for each trade.
 |
|---|
As soon as a lock is displayed on the left-hand side, it means that a user has already created actions for this action group. This restricts the possibilities for changes (actions/categories can be added, but not removed) and makes it impossible to delete them.
Bill of Quantities
After successfully uploading a BOQ, you are able to select the items that are relevant to you. When you create a new force account work report in the Construction Report, these items will be available for use.
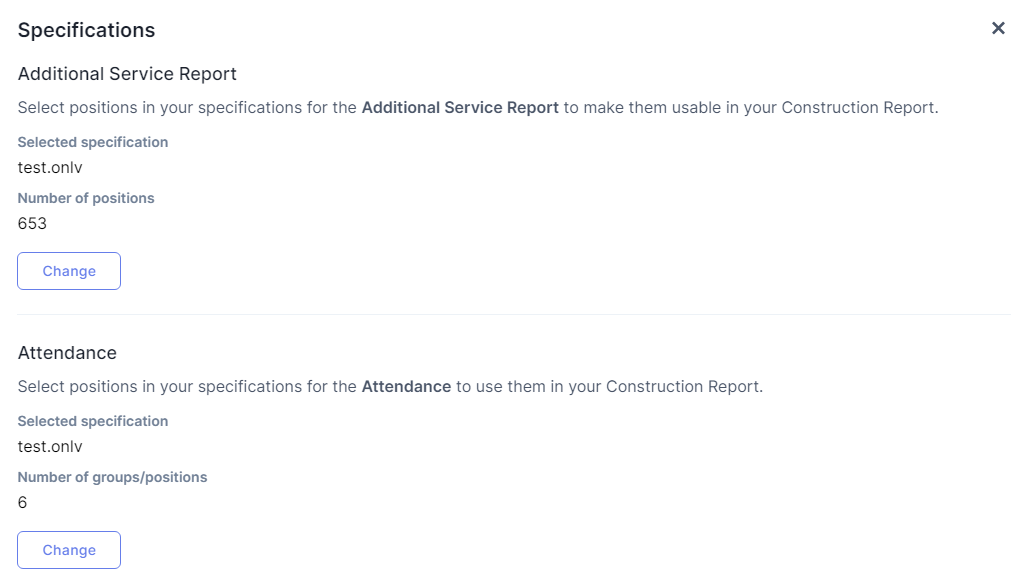
Select the "Trade Mapping" tab and click on the "Map positions from BOQ" button of your chosen trade. Now you can select between "Additional Service Report" and "Attendance" by clicking on the corresponding "Change" button.
 |
|---|
With the help of these information you will be able to add productive hours to your Construction Report.
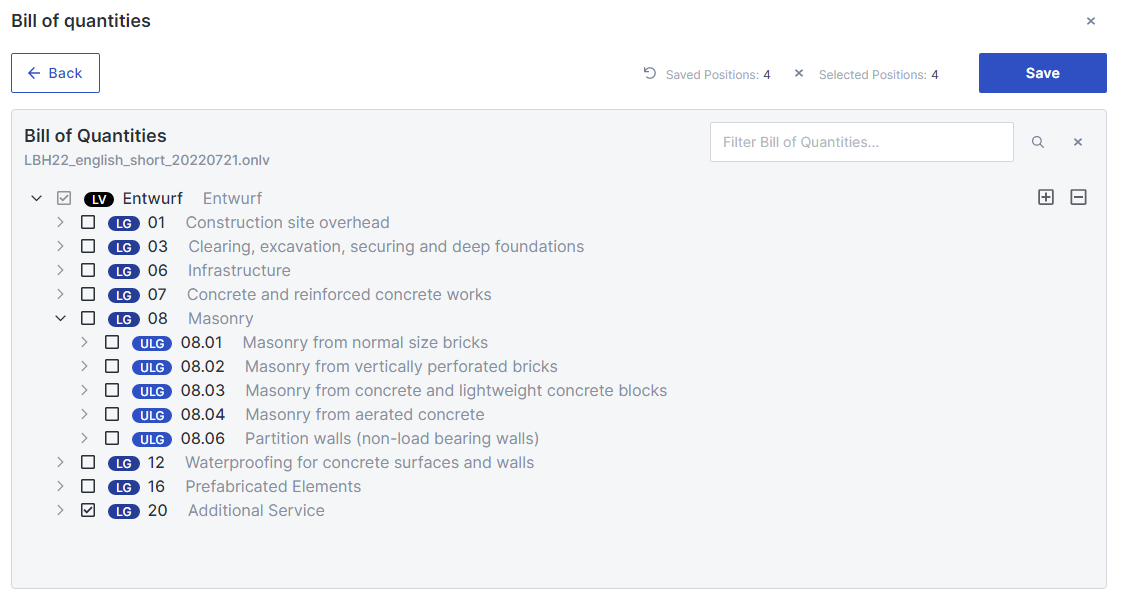
Now you are able to choose your desired positions from a list. By clicking on "Save" you end the selection process.
 |
|---|
The searchbar helps you in finding specific positions.
When selecting objects in the "Attendance" list you need to consider that selecting an ULG will not automatically select all its Positions.
You are able to select all subgroups by checking the name of the type of position behind the name of the LG
You are also able to create a custom BOQ. More on this topic here.
Deleting Trades
In general, only trades, actions or action groups that have not been used in the Construction Report yet can be deleted.