Filters
Learn more about the different filters, their functions and how to select them in here.
Filter Views
By clicking on "Filters & More" you open a window, which is dedicated to helping you locate and display the components that concern you. There are essentially two kinds of filters: filters related to the construction progress made (concreting, finishing, etc.) and parameter-related filters (floor, type of concrete, etc.).
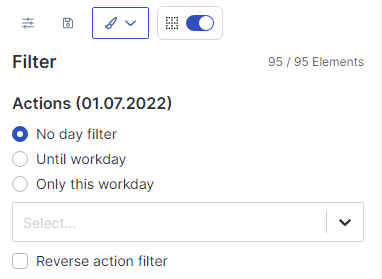
To display the progress, you can set the action filter to one of the three options:
- No day filter
- Up to workday - all components are filtered that have been processed for your project up to the selected date.
- Only this workday - only the components of the selected workday will be displayed.
The other filters refer to the parameters of the components.
If you set a filter, your view will be centered on the filtered components.
The filters available to you are set by your project manager and can be edited by him or her at any time.
Action Filter
Actions are defined for each specific trades by the project manager and assigned to completed components by the users directly on the construction site.
Each action is assigned a color, too.
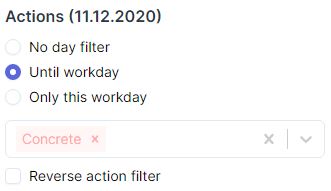
You have the possibility to choose between "Up to workday" or "Only this workday" to set the period which you want to filter whenever you wish to filter by date.
You can use the function "Invert action filter" to apply an inverse filter to the model. This will hide all components that match the criteria entered.
Using the drop-down menu, you can select one or more actions to filter all components that have already undergone a particular work stage or progress.
Component Filter
Your project manager has the possibility to create custom component filters for you. These open up new possibilities for filtering your project according to component properties.

Using the drop-down menu, you can enter the values to be filtered by. The selection of filters is mutually exclusive, which also means that a drop-down menu may be empty at times.
With the help of the drop-down menu you can select one or more actions according to which all components are filtered. By applying a certain filter option, all components which have undergone the selected action, or actions, will be shown.
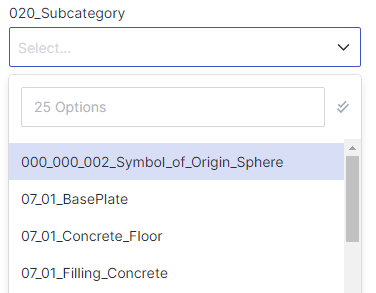
When confronted with a potentially confusing amount of options to choose from, the search bar can help you to find desired options more quickly and easily. It is also possible to use the button on the right (double tick) to select all options currently displayed with one single click.
After any change made to your filter settings, click on the green tick to activate the selected filter(s).
Component Filter - Settings
To create a component filter as a project manager, navigate to the project.
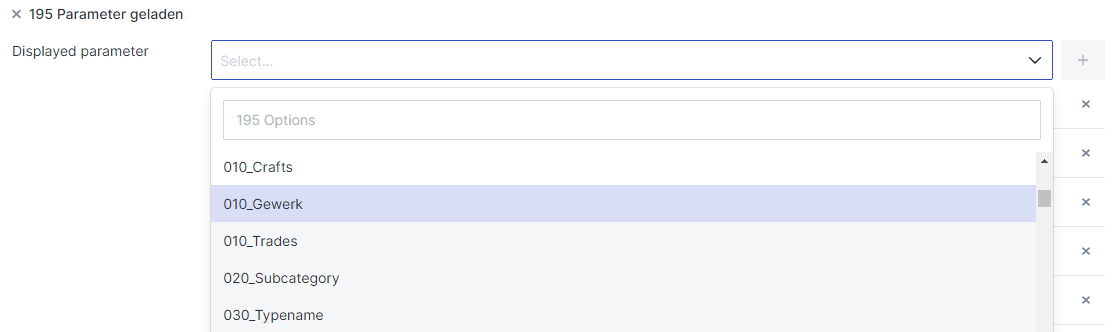
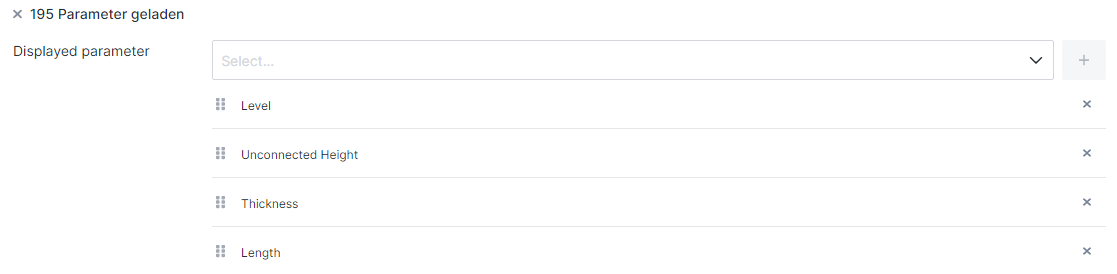
Under the tab "Settings" you can set your desired options for "Filter" and "Parameters". Before you can do this, however, you must first make sure to load the parameters of your project.
![]()
Then you can use the drop-down menu to add the parameters found to your project.
The filters you have created for the project are listed here. You can delete them by clicking on the cross.
Below you can create your filters. You have to give your filter a name and choose a parameter to filter by from the options available in the drop-down menu.
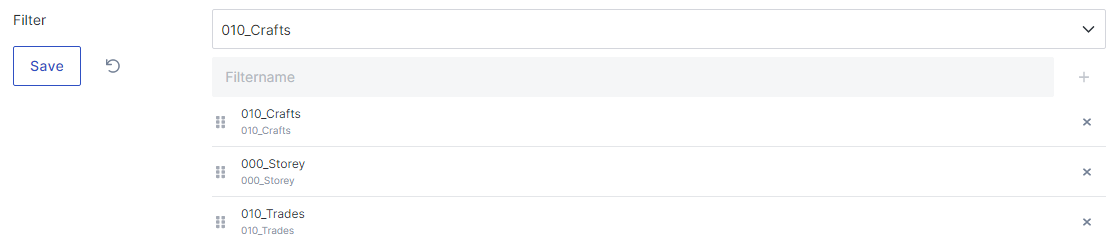
Here you will again see the available filters. You can delete them by clicking on the cross.
Filter Presets
To facilitate operation, you can save your currently activated filters as default filter settings called presets.
Once you have activated the desired filters, you can save them by clicking on the floppy disk icon.

You can assign any desired name to your presets. Below, you can furthermore determine the type of filter. In the drop-down menu you can choose between Dynamic and Fixed.
A "Dynamic" filter is applicable to all workdays. If, on the other hand, you select "Fixed", the filter is only applicable to a pre-selected workday. In this case, the filter is switched to the specified day before it is applied.
In addition, you can also share the filter with other trades. To do this, select the corresponding trade from the "Share with:" drop-down menu. The users of this trade can then see and activate the filter.
To activate a preset, click on the settings icon. Then you can select the desired filter by clicking the checkmark.

With the dustbin symbol you can delete older presets no longer needed.