Revit Add-in
To use our Revit Add-in for uploading your project, you need a current Revit version and must have the Add-In installed. This Add-In offers you the possibility to upload your models and download changes. After successful installation, you will find the Add-In in the "Additional content" tab.
Installation
In order to obtain our addin, please contact our Support.
Login
After starting the Add-In, you must log in with your Sitelife login data. If you have any problems logging in, please contact our Support.
You can only use the functions of the Add-In after logging in.
Uploading a Project
The Add-In actions include:
- Login: First log in with your Sitelife user data (email + password) to access further functions.
- Export: Upload your model and create a new sheet set on the Sitelife platform.
- Sync: Synchronise data entered in the model-based Construction Report back into your Revit project.
First, enter your Sitelife user data via the "Login" option in the window that opens (as described above).
 |
|---|
You are now logged in and can use the other functions. To upload the current model, you should first check the publishing settings of your project. These determine which of your 2D and 3D views are exported and uploaded.
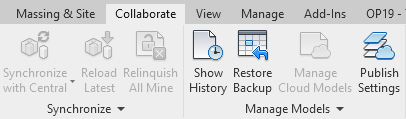
To do this, click on the tab "Collaboration" > group "Manage Models" > and on the icon ![]() (Publishing Settings)
(Publishing Settings)
 |
|---|
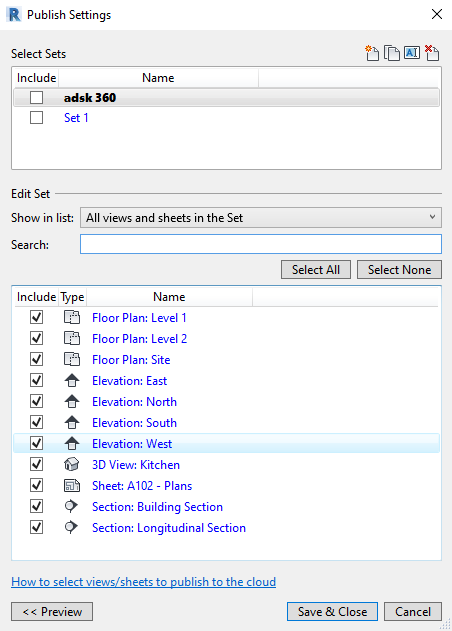
In the "Publishing Settings" dialogue box you can now create or select a selection group that contains all the views you want to publish.
Using the ![]() you can also create a new group and name it as you wish.
you can also create a new group and name it as you wish.
 |
|---|
Publishing settings must be pre-defined; otherwise only the standard 3D view will be exported!
Using the drop-down list and the search field, you can customise the views displayed and tick all the ones you wish to export. Then click on "Save and close", synchronise your project and continue.
To upload the project and the selected views now, select the "Export" option in the Sitelife Add-In. A list of your projects for which you can upload a model will open. From this list, select the desired model and click "Next" (this step is required only once per project).
 |
|---|
In the following, a dialogue box opens. Here, you have the option of giving your uploaded file any desired name and press "Upload".
 |
|---|
Depending on the size and complexity of the project, uploading your files can take varying amounts of time. After successful uploading, you can click on "Done".
You have now successfully uploaded your project and can explore it online in your project at under Models and Plans.
Sitelife generates an ID for all Revit links. If one of these links is deleted and added again, Sitelife assigns a new ID. As a result, the information generated by Sitelife can no longer be assigned to the element.
Because of this, you should update your links only by using the "Reload"-symbol. This ensures the correct assignment of the information to your elements.
Synchronising Information
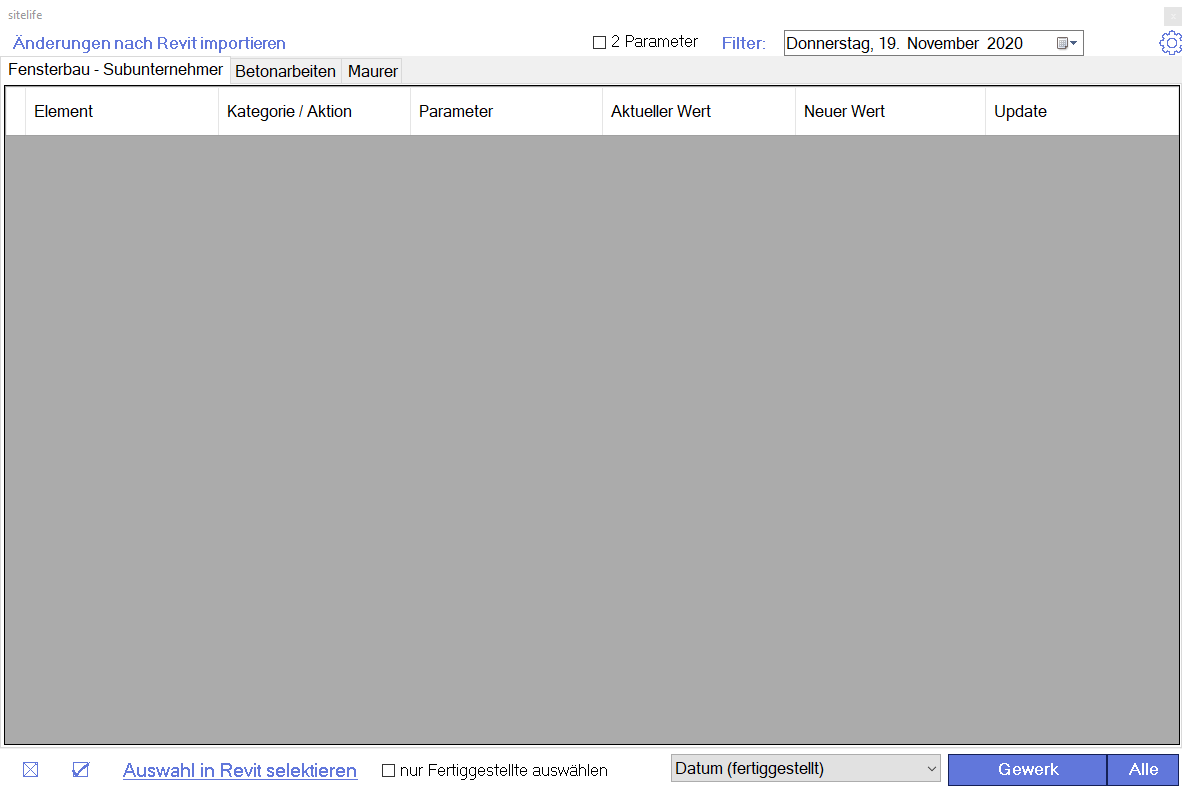
To synchronize the information entered on Sitelife back to Revit, click on "Sync" in the dropdown menu. The following window opens:
 |
|---|
At the top right, you can select the respective date, depending on which status you want to synchronize. Switch between the different trades using the tabs at the top left. In this example, no changes to elements are currently visible. You can select which information is added to the parameter box by using the drop-down menu at the bottom right, next to the "Trades" and "All" buttons.
 |
|---|
In addition to that, you must decide whether you want to synchronize only the currently selected trade or all trades.
Mapping
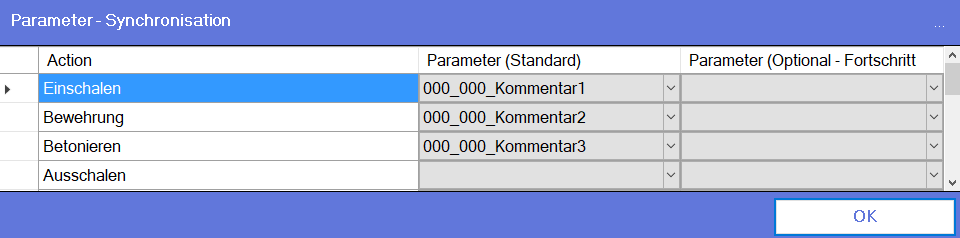
In order to synchronize the data from Sitelife back to Revit, you must define which action is to be added to which parameter. To do this, press the ⚙ symbol at the top right.
 |
|---|
In this view, you can assign a parameter for each defined action in which the respective data is written. Optionally, you can specify a second parameter to synchronise the date and percentage of a component separately. When you have finished setting this, press "OK".
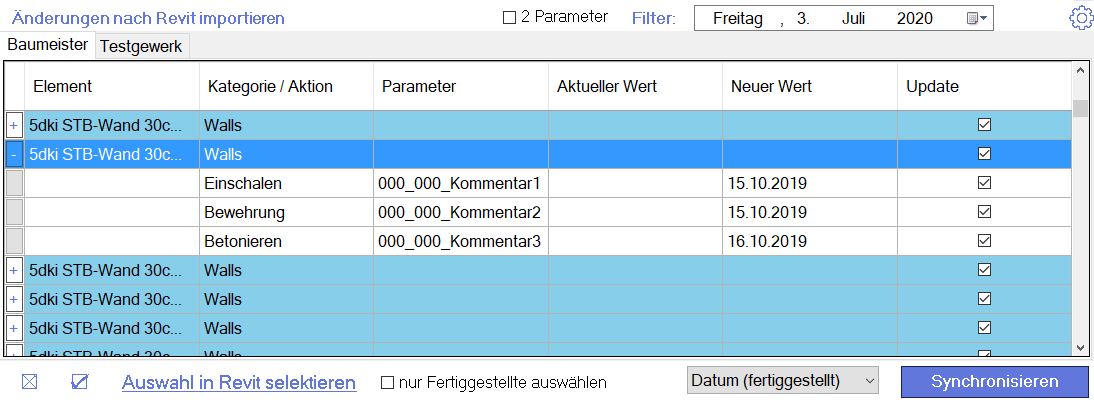
Synchronising
 |
|---|
You can now view all components in detail in the overview by clicking on the + symbol in the line on the left. With the checkbox on the right you can control which elements/actions are to be adopted and which are not - the buttons at the bottom left allow you to quickly select/deselect all of them.
If you have already set the mapping, this is the standard view you can expect. Click on "Synchronise" to apply all changes.
If you plan your project via a Revit central file, note that any changes in a local copy must first be synchronised with the central file. The Add-In will always connect to the central file for all actions.