First steps inside your Construction Report
After selecting your project and uploading a version you are able to start you Construction Report.
Starting
To open your Construction Report, navigate to the tab "Dokumentation" in the navigation bar. The model you are provided with depends on your trade and the connected set sheet.
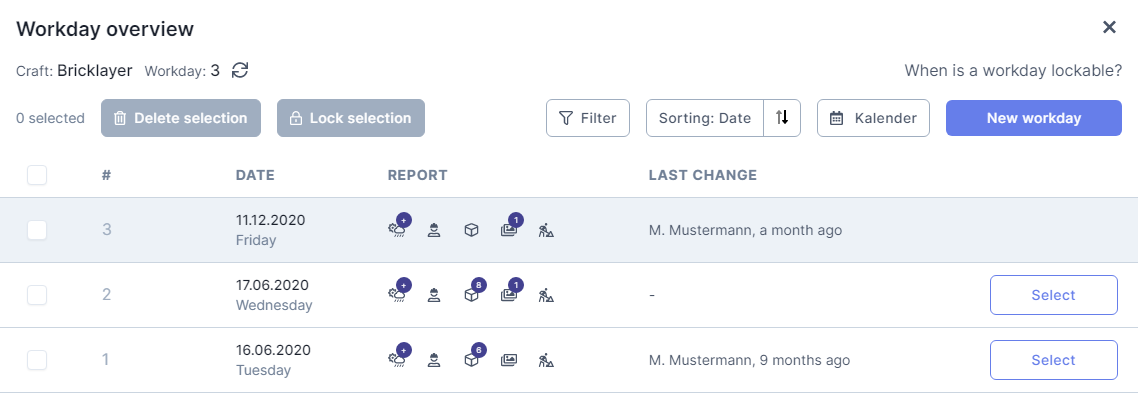
Date
To be able to work in your Report, you first need to create a workday. The date-button is located in the upper left corner. Here, you can create workdays and access previously created ones.
Additional information on the topic is located here.
 |
|---|
Viewer
After opening your Construction Report you find yourself in your work environment. The Viewer can be opened or hidden by clicking on "Model" at the top center of the window. Here, your model is displayed in an adjustable 3D-view.
There are multiple tools available to analyze and edit your model. Information on them can be found here.
Writing Your Report
The main panel of your environment is used to enter your workdays data. It is split into five separate areas.
Day Information
Here you can enter the following:
- Attendance
- Weather
- Equipment usage
- Comments
To create an entry, click on the respective "+"-button. You can find more information on these entry options and additional possibilities here.
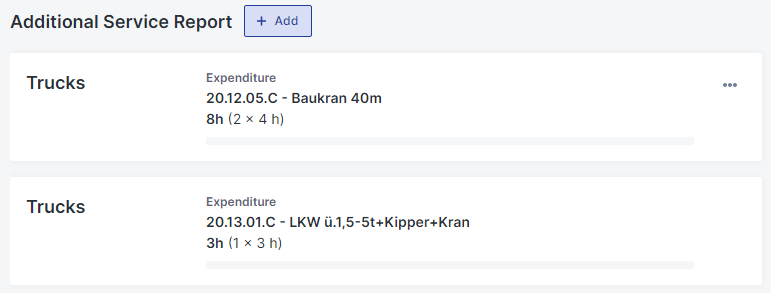
Additional Service Report (ASR)
By using ASR, you are able to add productive hours to your report.
 |
|---|
In order to do this, click on the "+" button in the upper right corner. In order for this to be possible, a Bill of Quantities has to be uploaded in advance. Also, you have to select the correct entry options.
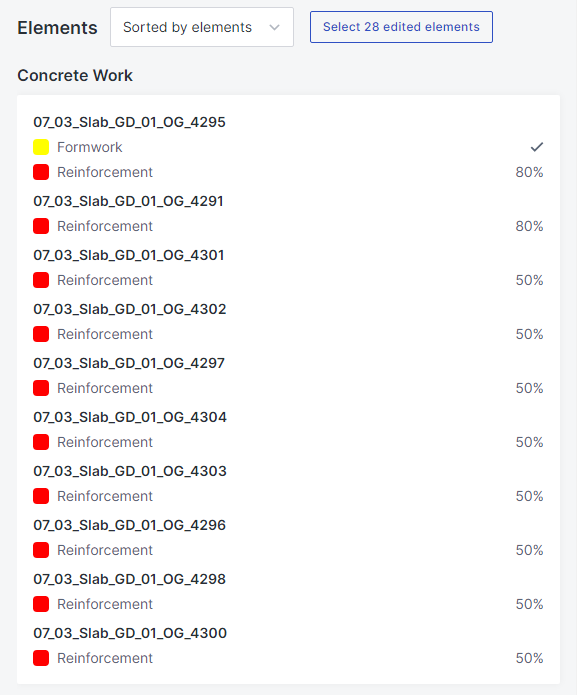
Elements
This tab is used to show the progress of the construction site.
 |
|---|
To record a step in construction, first click on the element is question and afterwards on element action at the bottom center of the screen.
Here you are able to record the actions your trade is allowed to perform. This is done by using the percent-slider. In case you are not able to perform any actions, your project admin is able to add some to your trade.
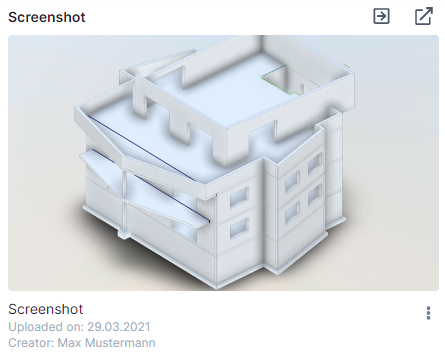
Images
Here you are able to create or upload images. By clicking on the "+" in the upper right corner, you are able to select between two actions:
- Taking a screenshot will capture the current view your viewer shows.
- Uploading an image lets you choose a file from your device.
 |
|---|
Both options allow you to add a description to your image. Additional information can be found here.
Filter and Element Information
The button "Filters & More" on the right opens a panel which is used to navigate your model and to show information about it.
Filter
The filter offers additional possibilities to navigate your model.
You can filter by time and action. In addition to this you are able to create an element filter. How to do this and additional information on filters can be found here.
Properties
Before uploading your model, it can be fit with information. By navigating to the properties tab, you are able to access this information. Select an element and the information will be listed here.
Elements
Here you find a list of all elements in your model. By clicking on the name of the element, it is also selected in your viewer.